Infocenter Views
Overview
Infocenter Views allow partners to define preconfigured search queries in the partner portal. These views serve as custom navigation elements (e.g., categories) that can be:
- Attached to Infocenter data
- Utilized through the Infocenter Search API
The goal is to provide greater flexibility in tailoring the search and data experience per project or partner.
Info
If you want to get started quickly, you can use the View Quickstart
Infocenter View Management
To manage Infocenter Views, we are introducing new CRUD operations in the Infocenter API.
Info
These endpoints are accessible only to authorized consumers of the Infocenter View service, using the partner's definition context.
| Endpoint | Second Header | Request | Response |
|---|---|---|---|
| GET search/views | Get all search views | - | SearchViewResponse[] |
| GET search/views/{id} | Get search view by Id | - | SearchViewResponse |
| POST search/views | Create search view | SearchViewRequest | SearchViewResponse |
| PUT search/views/{id} | Update search view | SearchViewRequest | SearchViewResponse |
| DELETE search/views/{id} | Delete search view by Id | - | - |
Infocenter Views in Search Requests
- A
viewIdparameter is added to the SearchRequest. - The corresponding view definition is loaded and used as a base configuration.
- The active search request is merged into the base view definition dynamically.
Facets response names in views
Search views allow to define multilingual facets names. When a view is used in a search request, appropriate facet name will be selected based on the Accept-Language header of the request.
Example of search view with multilingual facet names
{
    "name": "Sample search view",
    "searchRequest": {
        "project": [
            "sample-project"
        ],
        "facets": [
            {
                "name": "tag",
                "responseNames": {
                    "de": "Saison",
                    "en": "Seasonality"
                },
                "additionalType": [
                    "seasonality"
                ]
            }
        ]
    }
}
Information
When language from Accept-Language header is not present in responseNames, the default language (de) will be used.
Infocenter Views in API Responses
- A new property
viewis added to each object. - This property lists the view IDs related to the object.
- Views for the current project or partner are merged into the response, if requested.
View Creator UI
A user interface component is provided to assist partners in creating and managing views within the context of a selected project. It is available in the Partner Portal under Infocenter Views once the Infocenter Views service is active for your organization.
At a high level, the View Creator UI lets you:
- Define a saved search: which project, which filters, which sort order and which scoring profile a view uses.
- Define the facets (filter groups) that a website shows next to the results, with display names per language.
- Preview the result immediately, rendered with the same landing web component that you could use on your website too..
- Manage your views: find, rename, update and delete them.
Everything you save in the View Creator UI is stored in the Infocenter as a SearchViewRequest (see
Infocenter View Management). Websites and apps only reference the view by its
ViewID, so a change in the View Creator UI is live on every website using the view without any deployment.
Tip
For a hands-on example, see the quickstart How to build an event calendar, which creates a view for events with the View Creator UI.
The views list
When you open Infocenter Views, the list of all views of your organization is shown.
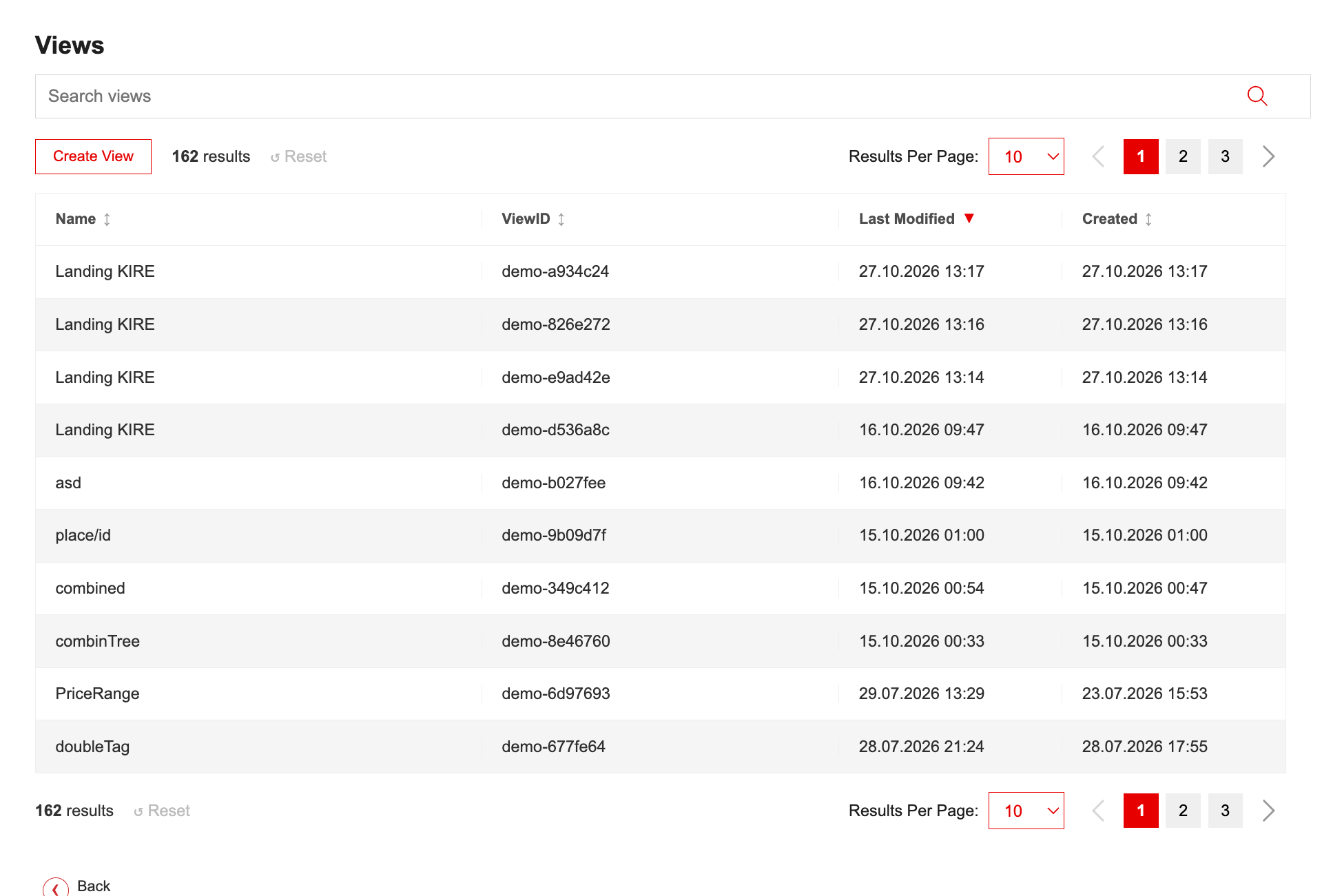
| Element | What it does |
|---|---|
| Search views | Filters the list as you type. It matches the Name and the ViewID of a view. |
| Create View | Starts a new view, see Create a view. |
| N results / Reset | Number of views matching the search. Reset clears the search, the sort order and the pagination. |
| Results Per Page | How many views are listed per page (5, 10, 25, 50 or 100). |
| Name, ViewID, Last Modified, Created | Click a column header to sort by it. By default the most recently modified view is on top. |
Click a row to open the view. The ViewID (e.g. demo-8c004c9) is the id you pass to the landing web component or
to the search API as viewId.
Create a view
- Click Create View.
- Enter a Name in the Edit name dialog and click Apply. Choose a name that tells your colleagues what the
view is for, e.g.
Events Region ExampleorFamily activities.
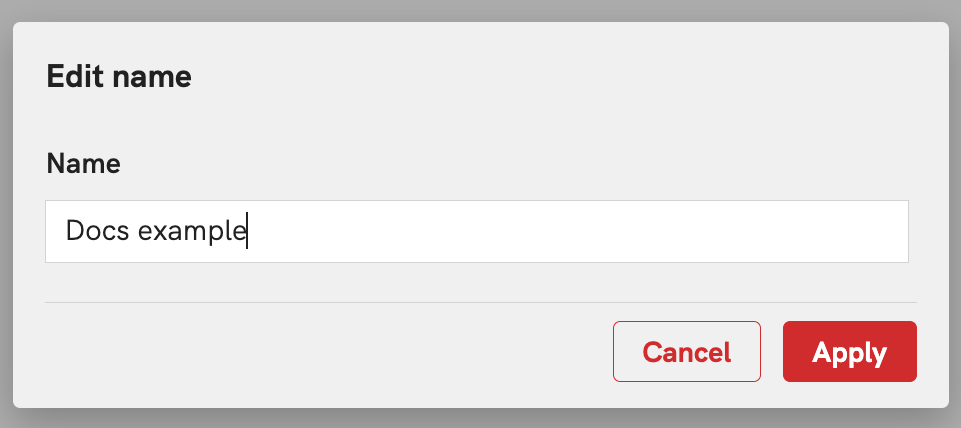
- The view is saved immediately and gets its ViewID. The view opens on the Overview tab.
A new view has no filters and no facets yet: it returns all objects of your project. Use the tabs described below to narrow it down.
The view page
The view page has a header and five tabs.
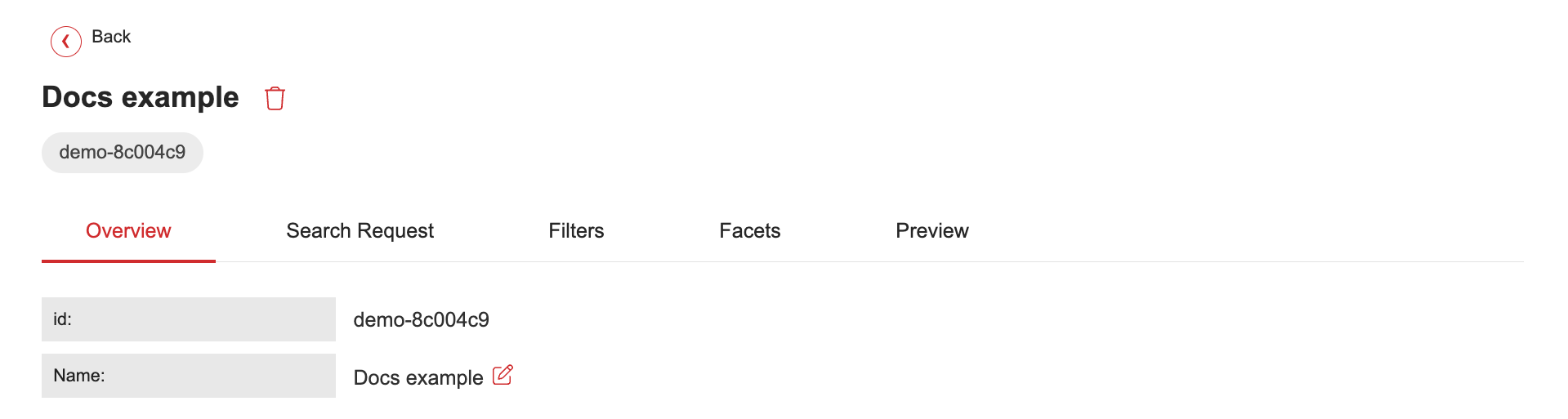
- Back returns to the views list.
- The view name and the ViewID chip are shown in the header. The trash icon deletes the view, see Delete a view.
- Overview:
idand Name of the view. Click the pencil icon to rename the view. - Search Request: update schedule, project, sort order, selected fields and scoring.
- Filters: which objects belong to the view.
- Facets: which filter groups the website shows next to the results.
- Preview: the result as your visitors will see it.
Search Request tab
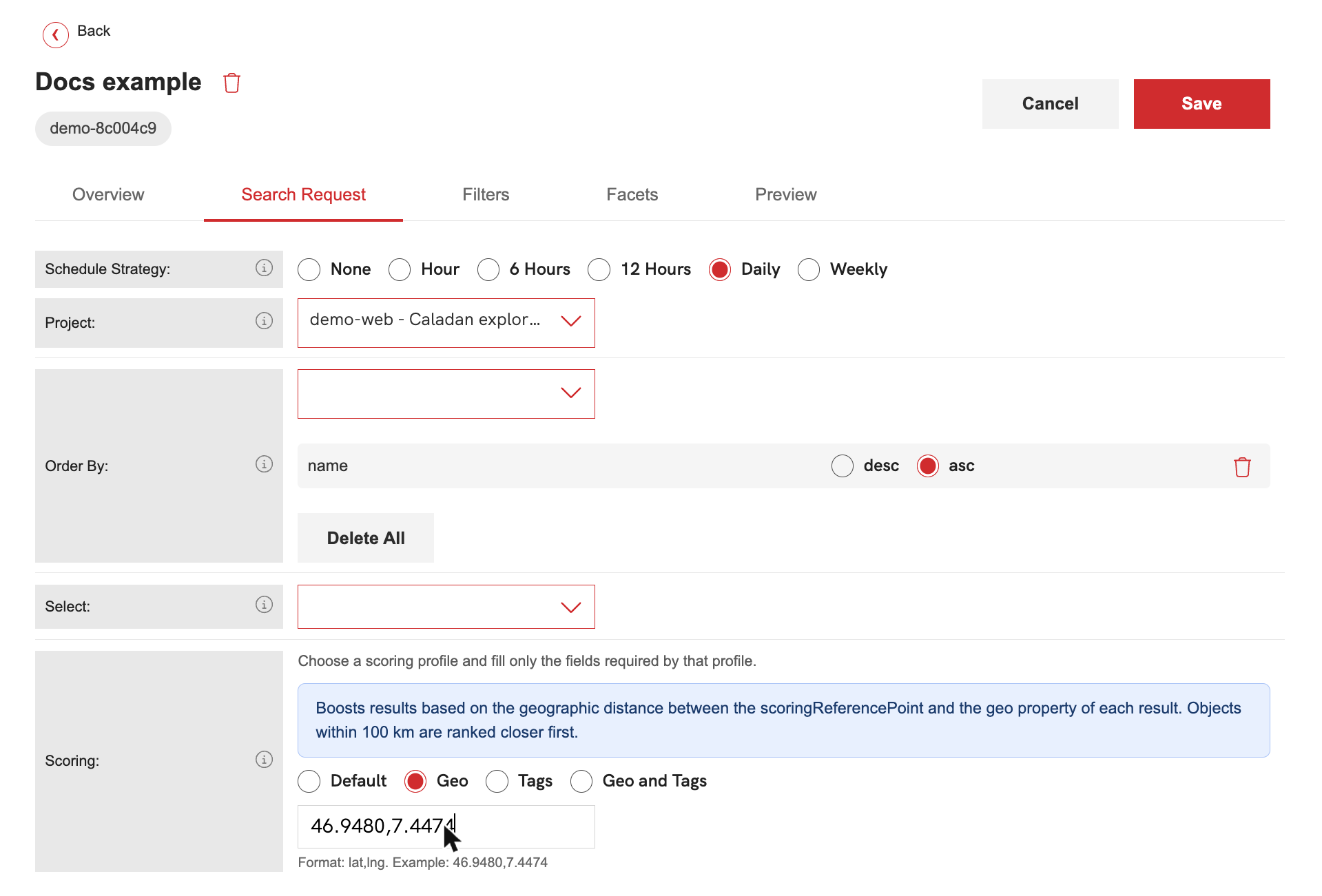
The Search Request tab holds the general settings of the saved search request. Hover the info icon of a row for a short explanation and a link to the related documentation.
| Setting | Description |
|---|---|
| Schedule Strategy | Defines how often the Infocenter refreshes the view. This setting only applies to Offline Views, as regular views always retrieve data live from the Infocenter through a standard search request. Set to None to disable automatic refreshes, or select Hour, 6 Hours, 12 Hours, Daily or Weekly (API values EveryHour, Every6Hours, Every12Hours, Daily, Weekly). |
| Project | The Infocenter project whose data the view contains. The field is only shown, and only saved, when a schedule strategy is selected. Without a project in the view, the project comes from the search request, e.g. from the projects setting of the landing web component. |
| Order By | Sort order of the results. Pick a field from the list (e.g. Name, Next Occurrence, Created, search score) and choose asc or desc. Add several fields to sort by more than one criterion; Delete All removes them. Choose manual to type any sortable field, e.g. name/de. See Sorting. |
| Select | The properties the search returns. Leave it empty for the web components, they need the full objects. See Selecting. |
| Scoring | The scoring profile: Default (text relevance), Geo (distance to a reference point), Tags (matching profile tags) or Geo and Tags. Geo needs a reference point as lat,lng, e.g. 46.9480,7.4474. Tags need a comma-separated list of tags, e.g. profile-sport-1,profile-sport-2. |
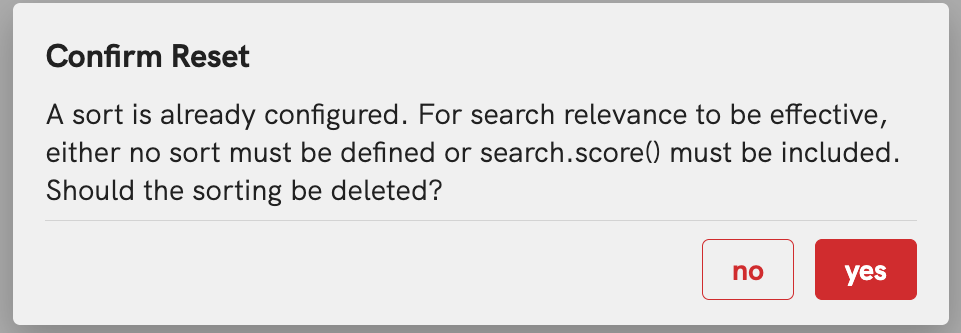
Sorting and scoring exclude each other
Scoring only affects the order of the results when no sort order is defined, or when search.score() is part of
the sort order. If you define both, the View Creator UI asks you with the dialog Confirm Reset whether the other
setting should be removed. Answer yes to remove it, or no to keep both. In the second case, make sure that
search.score() is part of your Order By, otherwise the scoring has no effect.
Filters tab
Filters define which objects belong to the view. All filters of a view always apply: a visitor can narrow the result down on the website, but never see objects outside the view.
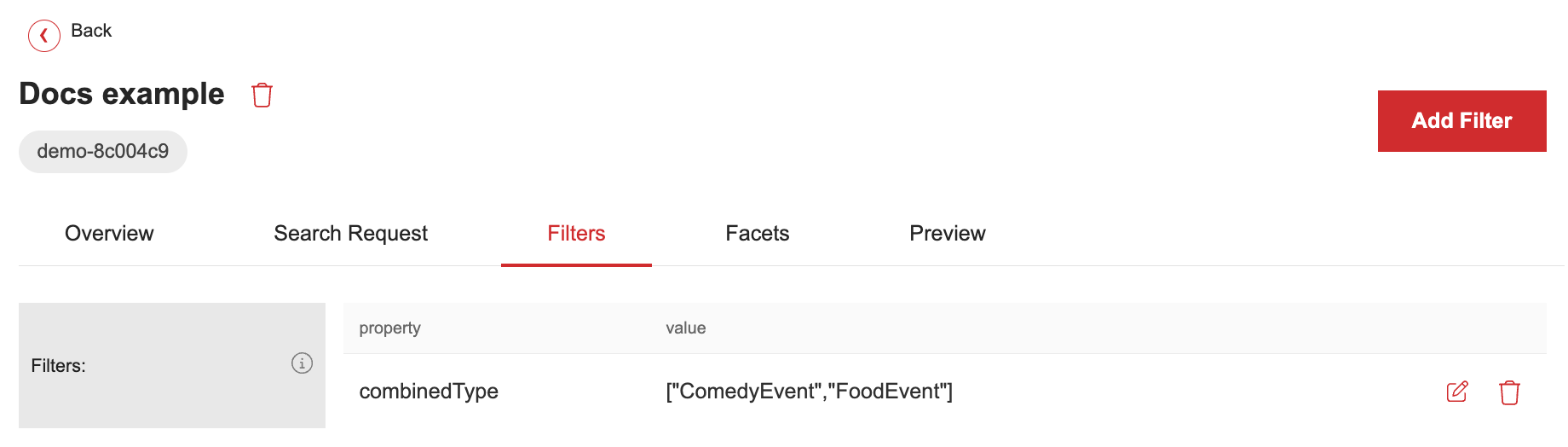
The table shows one row per filter property with its values, a pencil icon to edit the values and a trash icon to remove the filter. Deleting asks for confirmation.
Add a filter
- Click Add Filter.
- Choose the property to filter by. Type to search the list. Every entry has a short description, and properties that only apply to one type are marked, e.g. Tour or Lodging.
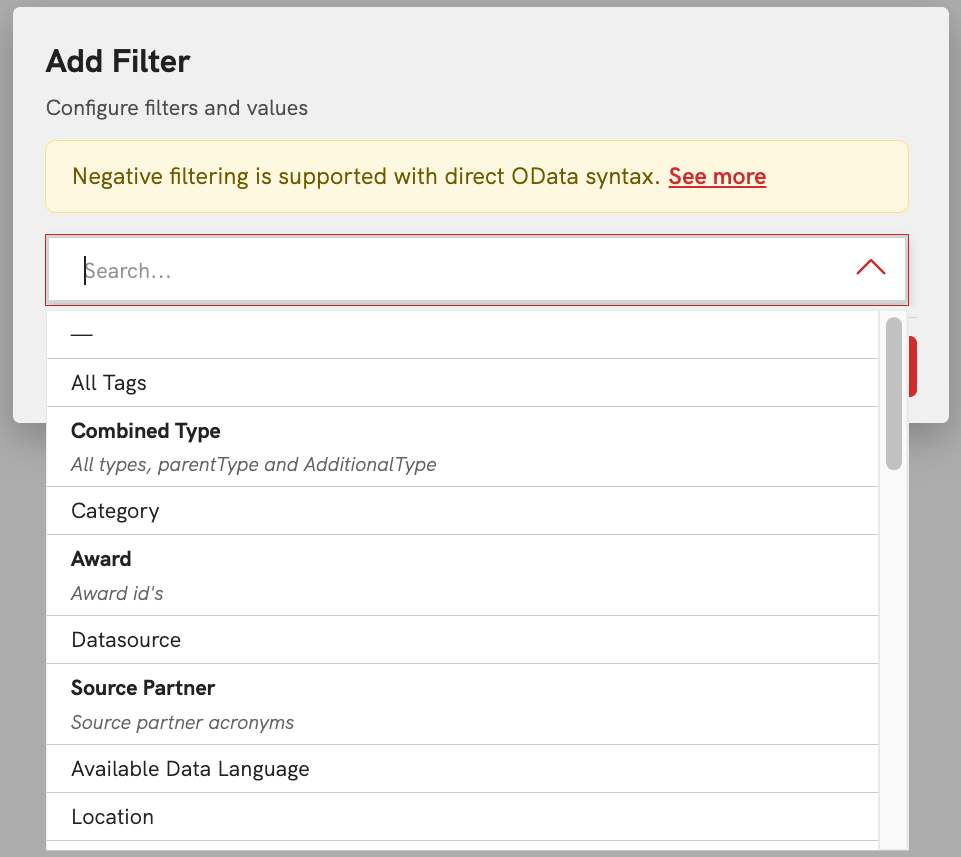
- Choose the values. Depending on the property, you pick them from a searchable list (e.g. Category, Combined Type, All Tags, Contained In Place), tick checkboxes (e.g. Star Rating Value, Price Range), choose True / False (e.g. Has Geo Shape) or type them (e.g. Datasource, Source Partner, Address Postal Code).
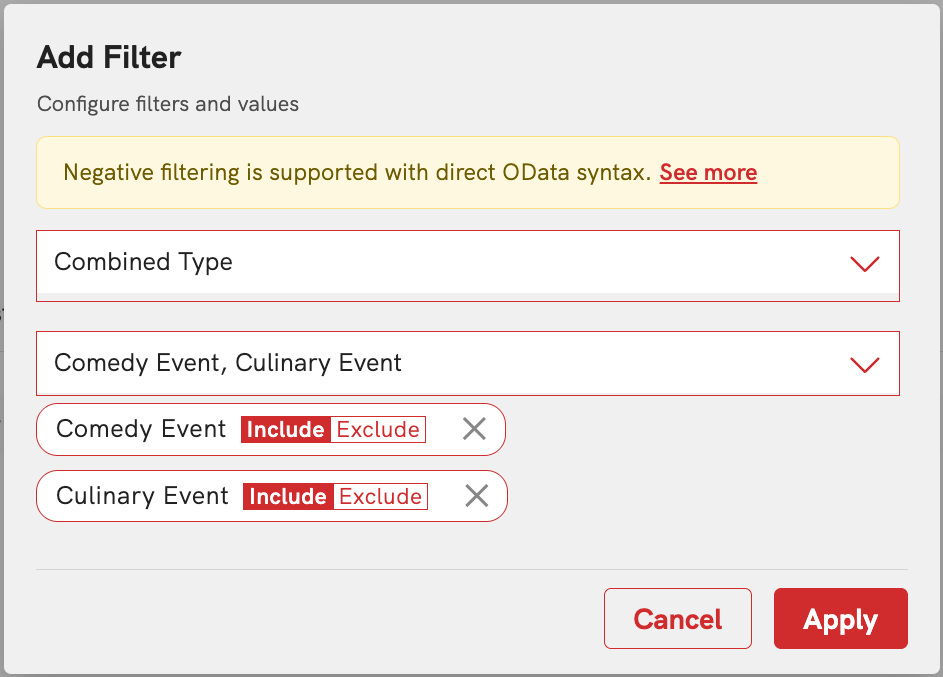
- Every selected value has an Include / Exclude switch. Include keeps objects with this value, Exclude removes them from the view.
- Click Apply. The filter is saved immediately.
How values are combined
- Several values of the same property are combined with a logical OR:
Combined Type = Comedy Event,
  Culinary Event
returns comedy events and culinary events. - Different properties are combined with a logical AND: a Combined Type filter plus a Contained In Place filter returns only objects matching both.
- Excluded values are stored as OData filters and always remove the matching objects.
The most frequently used properties:
| Property | Use it to |
|---|---|
| Combined Type | Restrict the view to types such as Event, Tour, LocalBusiness or Hotel. It matches the type, the parent type and the additionalType of an object, see Filtering by CombinedType. |
| Category | Restrict the view to one or more categories of the discover.swiss category tree, e.g. Hiking or Family. |
| All Tags | Restrict the view to objects with specific tags, e.g. a campaign or a season. |
| Contained In Place | Restrict the view to a region, destination or municipality (an administrative area). |
| Address Locality / Address Postal Code | Restrict the view by city name or postal code. |
| Datasource / Source Partner | Restrict the view to the data of specific providers, e.g. only the events of one source. |
| Location | Restrict the view to objects at specific places, e.g. all events in one venue. |
| Award, Amenity Feature, Star Rating, Price Range, Season, State, Rating Condition / Difficulty | Type-specific attributes for lodging, tours and products. |
The full list of filter properties with their API names is documented in Custom filter properties and Filtering.
Warning
Not every filter property of the search API is available in the Add Filter dialog yet. If a property you need is missing from the list, use an OData filter instead.
OData filters
For conditions the filter list doesn't offer, e.g. a date range or a negative condition, add a raw OData filter. Click See more in the yellow box of the Add Filter dialog to open the OData Filter dialog, enter one expression per row and click Apply.
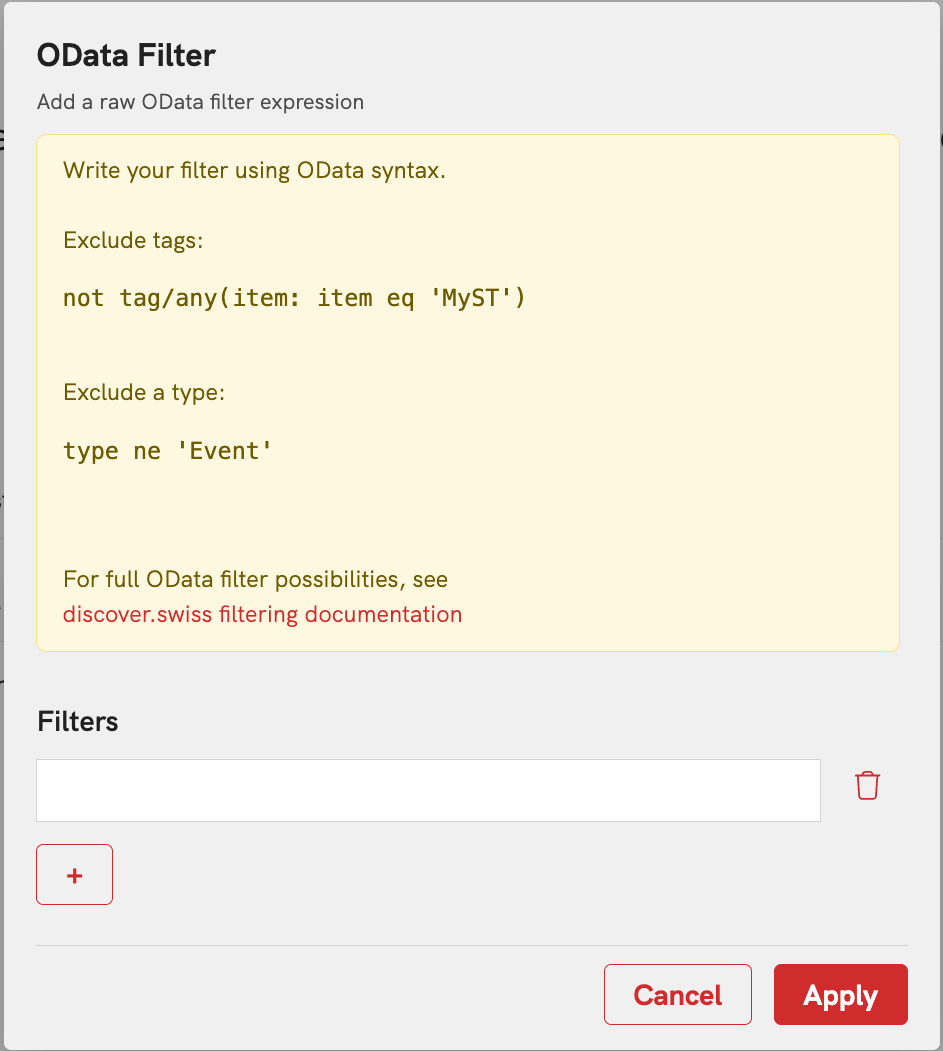
Examples:
| Expression | Effect |
|---|---|
type ne 'Event' |
Everything except events. |
not tag/any(item: item eq 'MyST') |
Objects without the tag MyST. |
rating/difficulty ge 3 |
Tours with difficulty 3 or higher. |
OData filters are shown in the filters table under the property filters and are combined with the other filters with
a logical AND.
Facets tab
Facets are the filter groups a website shows next to the result list, e.g. Category, Place or Season, each with its values and the number of matching objects. The landing web component shows the facets of the view automatically, so you define them once in the view and not on every website. See Facets for the concept.
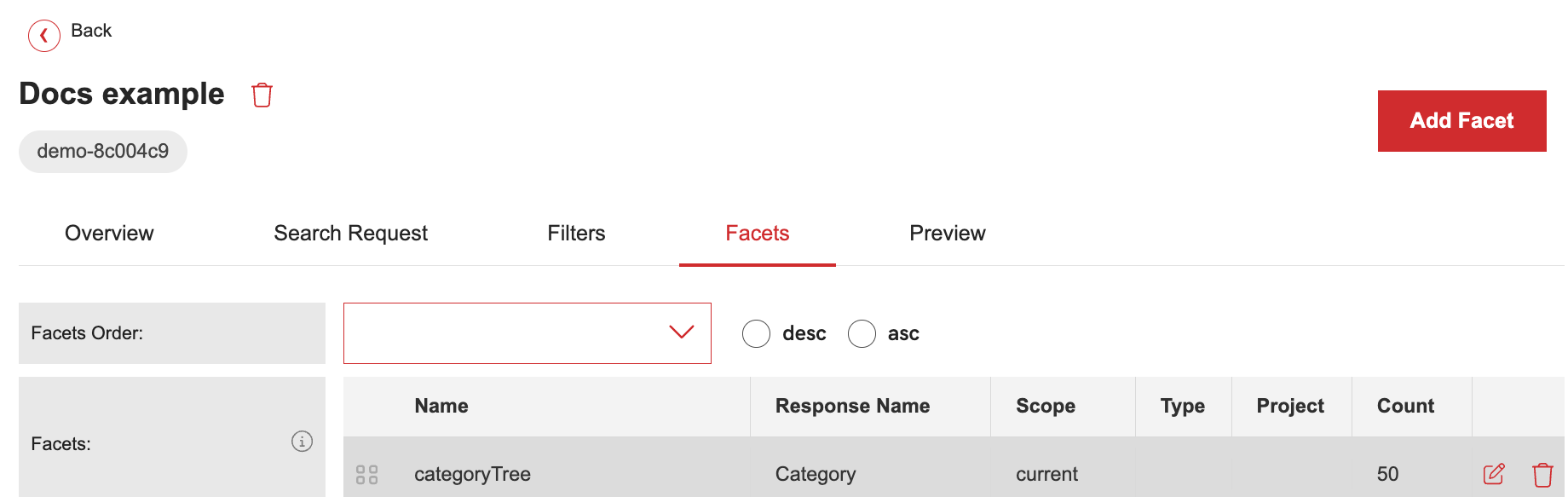
| Element | What it does |
|---|---|
| Facets Order | The facet the results of the facet request are ordered by, and the direction (asc / desc). This is a Search Request setting: click Save in the header after changing it. |
| Facets table | One row per facet with its Name (API property), Response Name (the title your visitors see for this property in the faceted navigation, shown here in the language of the View Creator UI), Scope, Type, Project and Count. Drag the handle on the left to change the order in which the website shows the facets. The pencil edits the facet, the trash removes it. |
| Show facets when none are defined | Only visible while the view has no facets. All lets the search API return its default facets, None returns no facets at all. |
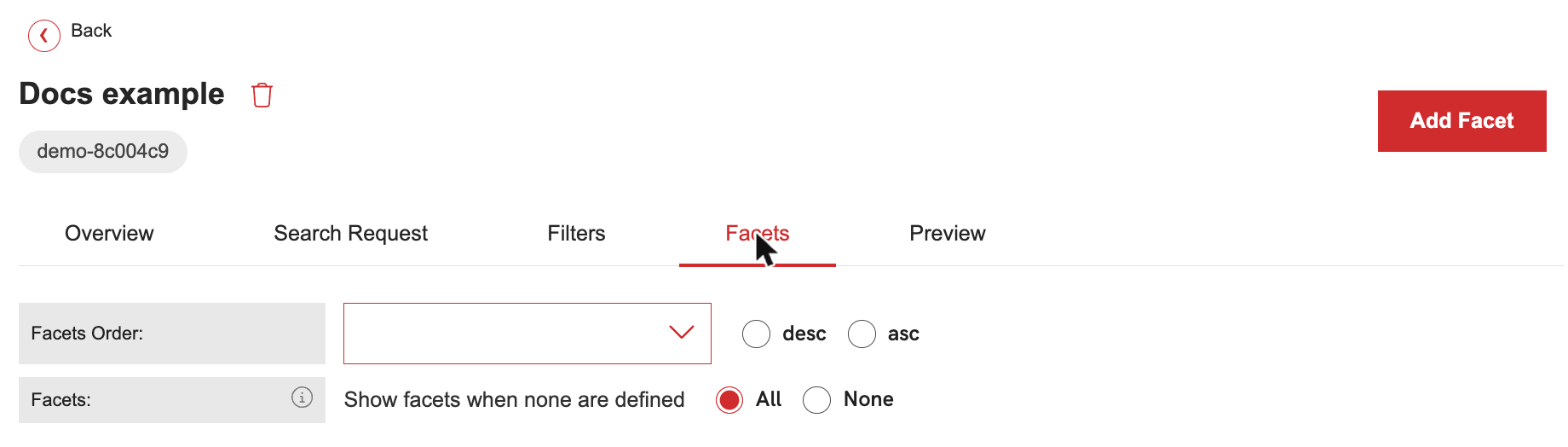
Add a facet
Click Add Facet. The dialog Add Facet to query has two columns: the left column defines the facet and how it appears, the right column controls which values it returns.
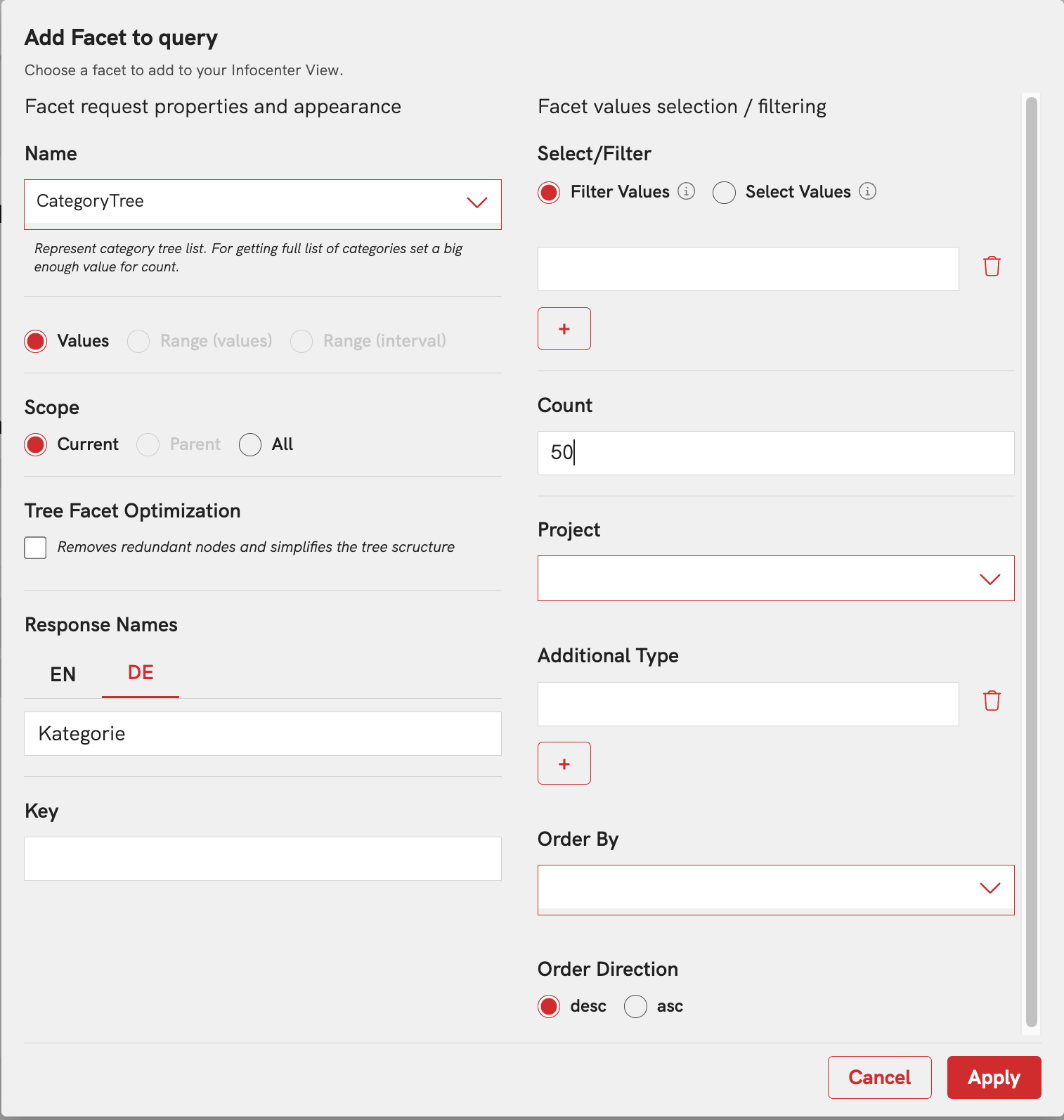
| Field | Description |
|---|---|
| Name | The property to build the facet from, e.g. categoryTree, tag, containedInPlace/id, address/addressLocality, season or priceRange. Type to search; the description of the selected property is shown below the field. |
| Values / Range (values) / Range (interval) | For numeric properties (e.g. standardPrice, length, time) you can return ranges instead of single values, see Range facets. |
| Scope | Current (default): the facet values respect all active filters. All: the facet values ignore the filter of this facet, so a visitor still sees the other options after selecting one. Parent: the filters of the parent level apply, for tree facets. See Usage of scope in facets. |
| Tree Facet Optimization | For tree facets such as categoryTree: removes redundant nodes and simplifies the tree, see Excluding redundant facet values. |
| Response Names | The label of the facet per language (EN, DE). The website shows the name matching the visitor's language, see Facets response names in views. |
| Key | Optional key to distinguish several facets with the same name, see Using multiple facets with the same name. |
| Filter Values / Select Values | Filter Values removes the listed values from the facet, Select Values returns only the listed values. See Usage of filterValues and Usage of selectValues. |
| Count | Maximum number of values the facet returns. For a full category tree, set a high value, e.g. 500. |
| Project / Additional Type | For tag, campaignTag, categoryTree, containedInPlace/id and award: restrict the facet values to those of specific projects or with a specific additional type, e.g. only tags of the type seasonality. |
| Order By / Order Direction | Order of the facet values: by count, name or value, ascending or descending, see Ordering of facets results. |
Click Apply. The facet is saved immediately and appears in the Facets table.
Note
A facet lists the values that exist in the result of the view. It does not restrict the result. To restrict the result, add a filter.
Preview tab
The Preview tab shows the view with the same landing web component you could integrate on your website, so you see exactly what your visitors will see: the search bar, the facets of the view with the number of matching objects, the result count and the result cards in the configured sort order.
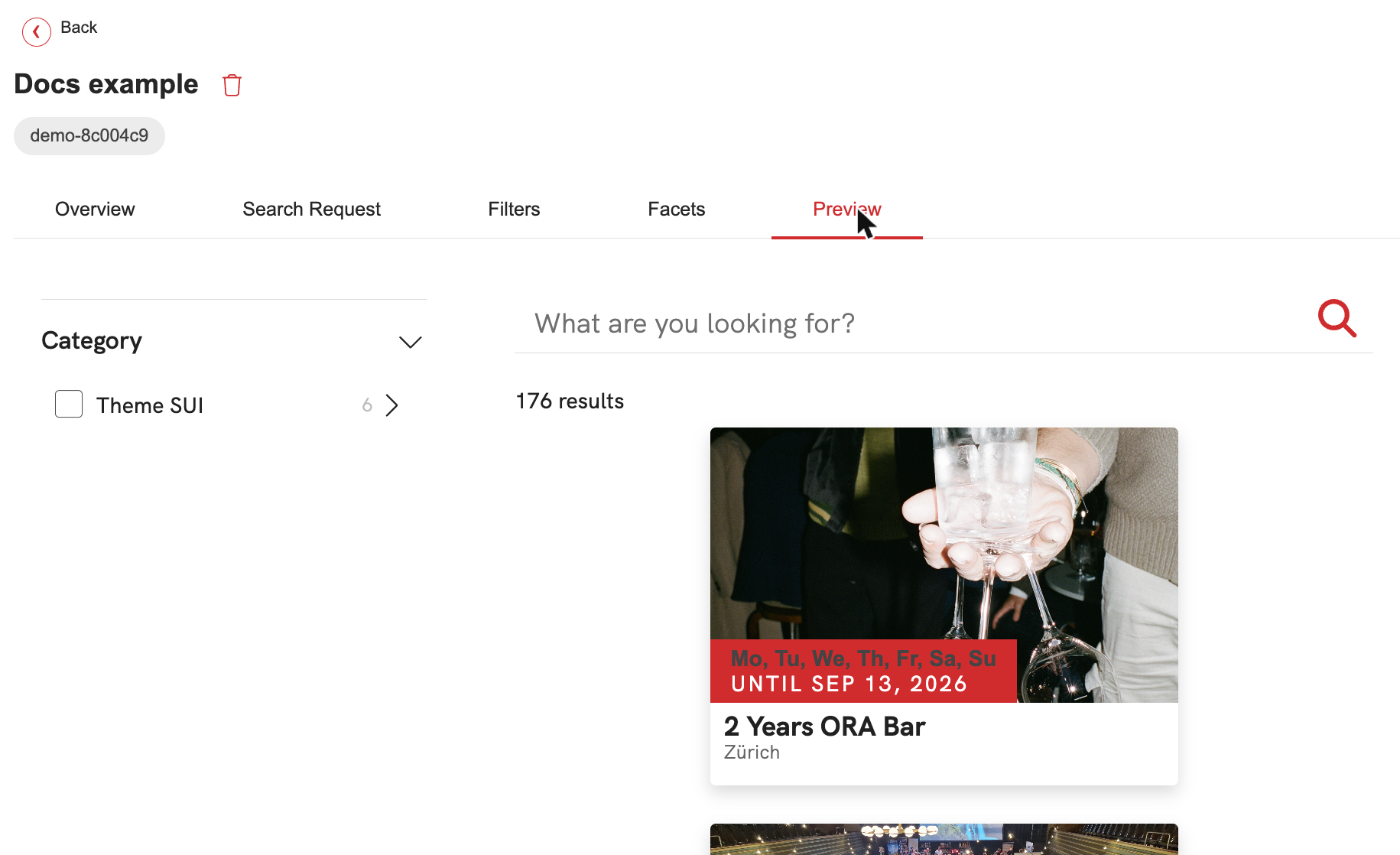
Use the preview to check your filters and facets after every change. Note that the preview searches the data of the environment you are working in, see Environments.
Delete a view
Click the trash icon next to the view name in the header and confirm with Delete.
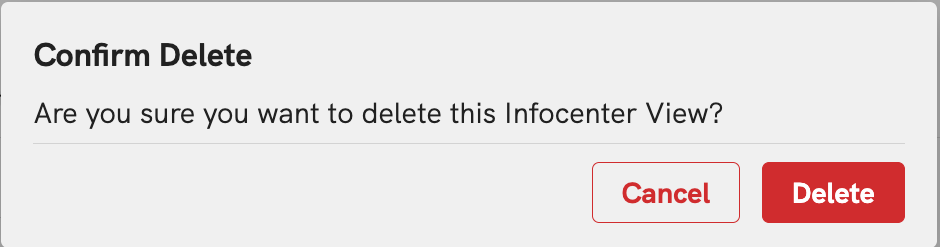
Warning
Deleting a view cannot be undone. Every website or search request that references the ViewID of a deleted view stops working. Check where the view is used before deleting it.
Use the view
After saving, copy the ViewID from the header or from the views list and use it:
- in the landing web component as
viewId, see Build an event calendar, - in the search API as
viewIdof the SearchRequest, see Search view.
In both cases the view is the base of the search and the request is merged into it, see View merge rules.
How a view is merged with the search request
When a search request contains a viewId, the view is the base of the search and the request is merged into it.
Filters of the request only refine the result, and facets follow a set of merge rules. Read
View merge rules for the details and the facets merge table.
Landing Page Integration
The existing Landing-Page component is extended to accept a viewId parameter and load the corresponding configuration.
See Build an event calendar for how to create a view and
show it on your website with the landing web component.
Please check back for updates as we continue to evolve this functionality.